
How-tos
NeXus Physiological Monitoring
If you have suggestions on how to improve this document, or find mistakes, please send them to ilslabs@nulluu.nl
Introduction
This is a step-by-step guide for running a NeXus experiment. The NeXus-10 can be used to measure facial muscle activity, skin conductance, respiration, blood volume pulse and skin temperature.
Before you start
- Access to the EEG lab is restricted. Contact Marijn Struiksma for details.
- Read the Introduction Guide to ILS Labs and follow all the steps there.
- You can reserve the EEG lab through the Reservation System.
- For details on opening hours, see this page.
- The lab is primarily meant for running experiments; you are expected to do some of your experiment preparation, and all of your data analysis, on computers outside the lab or in room K.06. Use the ILS Labs data server to move your data to other PCs, and to safely store it.
- Please contact Marijn Struiksma for a tutorial well before you are planning to run participants, and get some proficiency by observing/helping others run participants.
Important information
Using electrodes on participants
Although the procedures of placing and removing sensors are non-invasive, it is important to realize that the electrodes and other sensors have been in direct contact with the skin of multiple people. Therefore, it is important to keep a few things in mind.
- Carefully clean the sensors after each test session, wash your hands regularly, and be cautious when you or a participant has a cold.
- When placing sensors on a participant’s face, fingers or chest, you are pretty much invading the participant’s personal space. Therefore, at each step in the procedure of sensor placement, clearly inform the participant about the procedure in order to avoid participants feeling uncomfortable, and moreover, to avoid physiological responses of unannounced personal space intrusion.
Cleaning electrodes
Electrodes are very fragile and the lifespan of electrodes can be shortened drastically when handled without care. Therefore, it is important to keep a few things in mind when cleaning the electrodes.
- NEVER let the electrodes touch metal. Always remove all of your jewellery before preparing and cleaning the electrodes.
- When cleaning the electrodes, make sure that the water is lukewarm. The gel will dissolve more easily when the water isn’t too cold, but too hot water will cause the electrodes to break faster.
- Never let the electrodes lay in the water for too long; when you put them into the water, clean and (gently) dry them immediately.
- NEVER let the other end of the electrodes touch water.
- NEVER let the electrodes sit under running water.
- Always clean the electrodes as soon as possible, before the gel gets the chance to dry.
- Be sure that no gel is left behind on the electrodes.
- Always clean the electrodes gently, using a soft brush (or baby toothbrush). Don’t push or rub too hard.
Technical overview
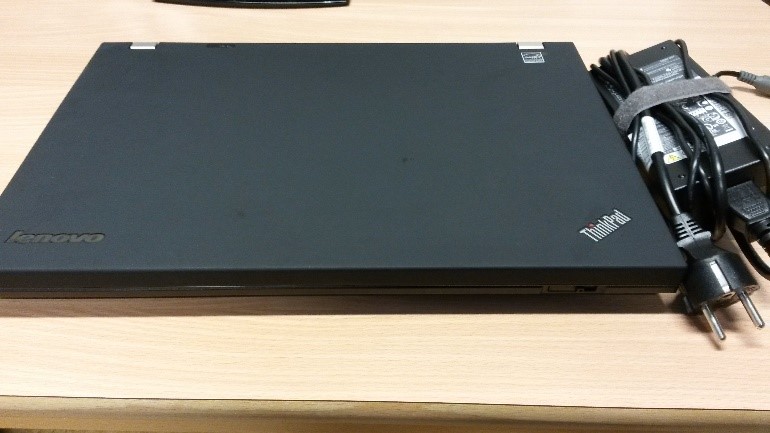
Acquisition laptop + AC adapter.
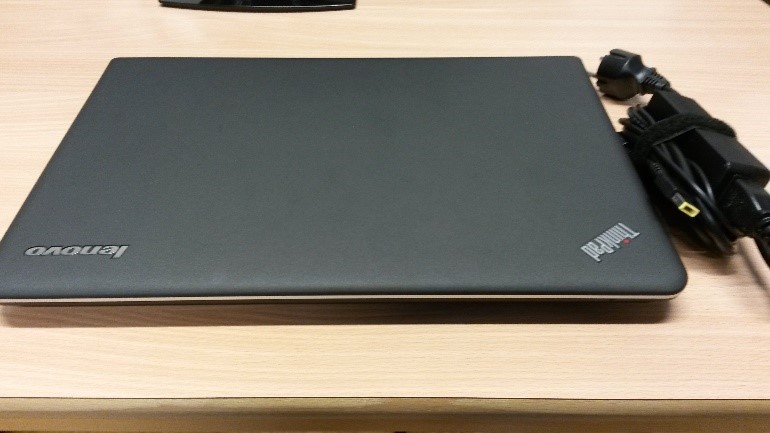
Presentation latop + AC adapter.
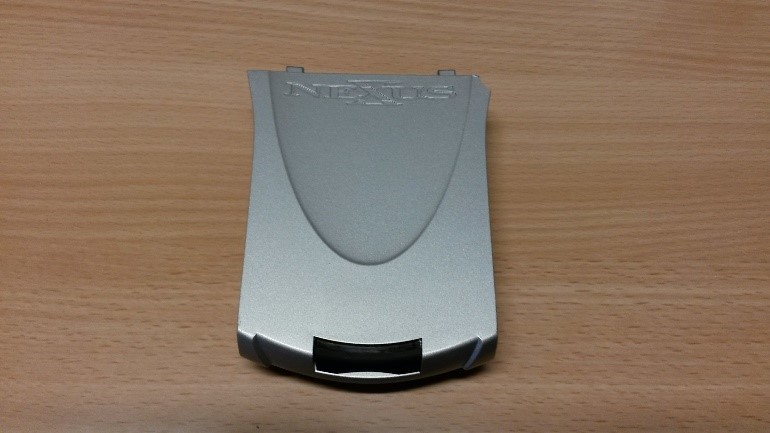
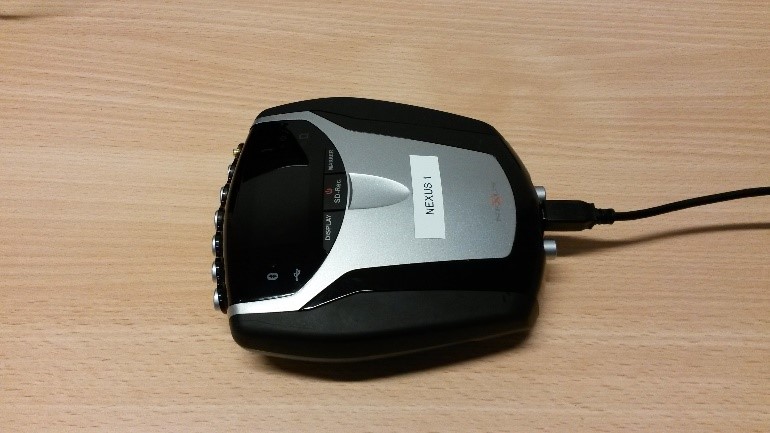
NeXus system

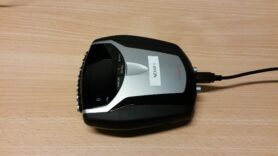
NeXus-10 Mark II
NeXus battery
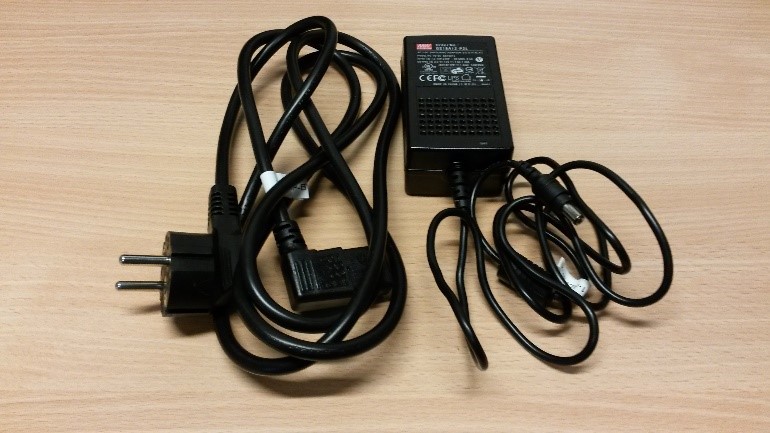
Main power adapter NeXus
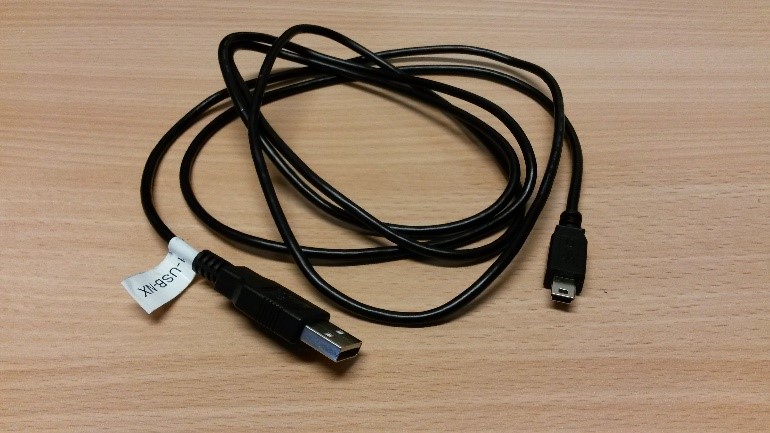
NeXus USB cable
Sensors
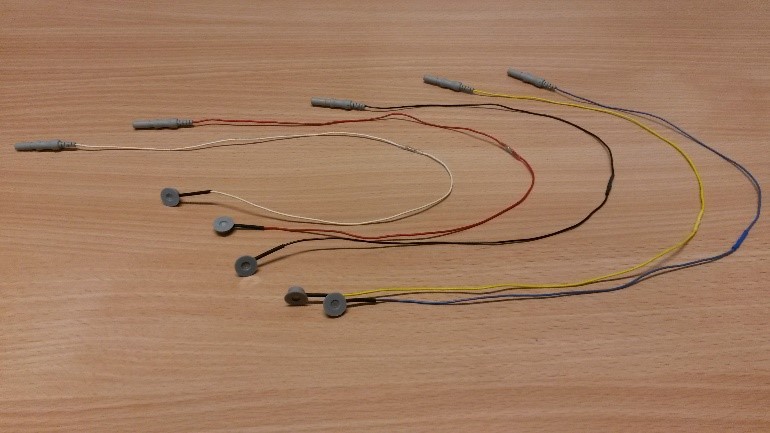
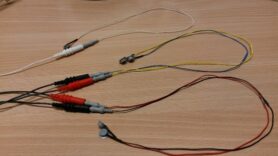
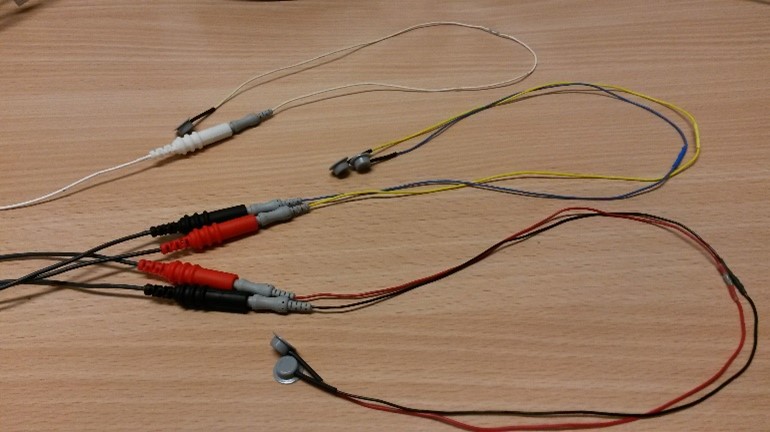
EMG-electrodes (5 pieces: white, red, black, yellow, blue)

TP cable for the reference electrode

TP cable for the four colored EMG electrodes
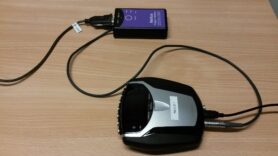
Trigger Interface case
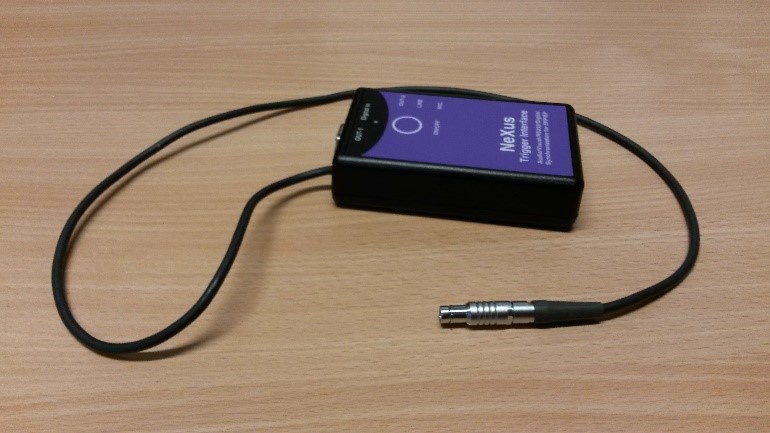
Trigger Interface
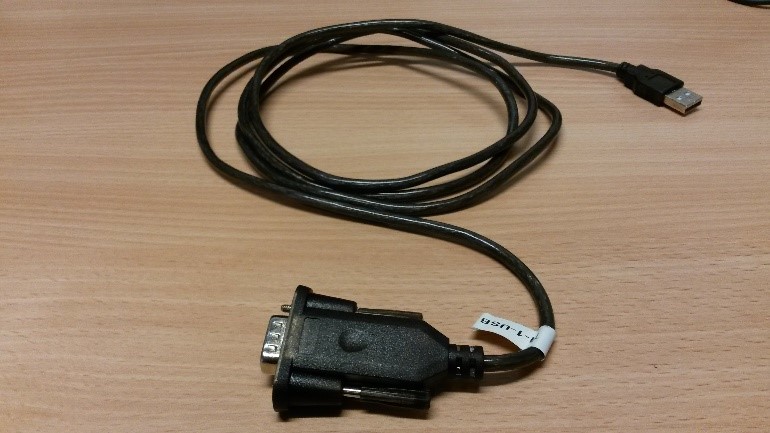
TI USB cable
+ 9V trigger interface battery
- EEG gel
- EEG gel syringe
- Electrode stickers
- Webcam (in K.13: OBS Studio on the experimenter PC in the experimenter room)
- USB extension cable
- 9V Battery Recharger + back-up 9V trigger interface battery
- Tape
- Alcohol
- Cotton pads
- Small scissors (to cut electrode stickers)
- Clothespins
Setting up your experiment
All research with human subjects has to be assessed by one of the two chambers of the Faculty Ethics Assessment Committee for the Humanities (FEtC-H). For more information click here.
For every experiment, it is necessary to have a detailed protocol. You can create one based on this how-to. Every protocol needs to be checked by Marijn Struiksma.
OBS Studio
Start ‘OBS Studio (64-bit) on the REC PC in experimenter room of K.13. Make sure that the video switch box (on the table left of the screens) is set to Participant view so the participant does not see anything on the local screen in front of them. The default setting is to mirror the upper Recording screen and with Participant View it switches to mirror the STIMULATION screen).
- If you want to use the STIM PC during the experiment, you can press the Windows logo > type and select ‘project to a second screen’ > select ‘second screen only’. Now the upper screen (which the PP also sees) is switched off and you can use the bottom STIMULATION screen.
- Note: OBS studio is only used to monitor the PP during the experiment, do not record!
NeXus device
- Place the battery in the NeXus,
- Connect the NeXus to the acquisition laptop using the Nexus-USB cable.
When using the extension cable, it is best to always use the same one (e.g., marked with a sticker).
- Connect the Trigger Interface to the NeXus using the bottom left port on the back.
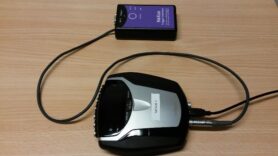
- Connect the Trigger Interface to the presentation laptop using the TI-USB cable; use the first USB port (closest to the front) on the left hand side.
- Start BioTrace+ NX10 on the acquisition laptop (Start > BioTrace+ NX10).
- Start Presentation on presentation laptop and make sure you have the right experiment loaded. Configure output port (COM 4, the first USB port on the left):
- Rate 115200
- Parity: None
- Data bits: 8
- Stop bits: 1
- Place the sensors on the participant’s desk.
- Plug the sensors into the right input ports (also see shortkey ‘i’ in BioTrace+ NX10/labels on sensors).
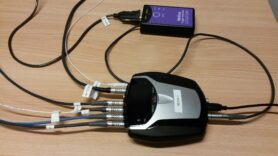
- Most left input port: ground electrode via white TP cable. Use the white electrode.
- A&B or C&D: EMG electrodes via TP cable
- When using an ILS Labs screen, use the A&B-port.
- Optional G: BVP (blood volume pressure) device


Electrodes
- Get alcohol, cotton pads and electrode stickers.
- Place the stickers on the EMG electrodes, without removing the white cover. Position sticker in such a way that the little tag to remove the paper cover is parallel to the electrode wire. Cut edges of sticker using the nail scissors to make it possible to place electrodes closer together.
- Prepare the syringe with EEG gel. You need very little gel for the EMG electrodes, so do not fill the syringe completely. Make sure there are no air bubbles in the syringe.
Running an experiment
- Help with recruiting participants is available here.
- A template consent form can be retrieved from the FEtC-H website
Stock of supplies
For EEG and EMG research we have all kinds of supplies, such as gel, stickers, cotton wool etc. To make sure we do not unexpectedly run out of gel for example, it is important to collectively keep an inventory of supplies and let Marijn Struiksma and Desiree Capel know in time when supplies are running low.
Details on the supplies procedure can be found on this page.
- Ask the participant to remove any jewelry, glasses, hairclips etc. Also ask if they have anything with them that they’d like to drink/eat during the breaks.
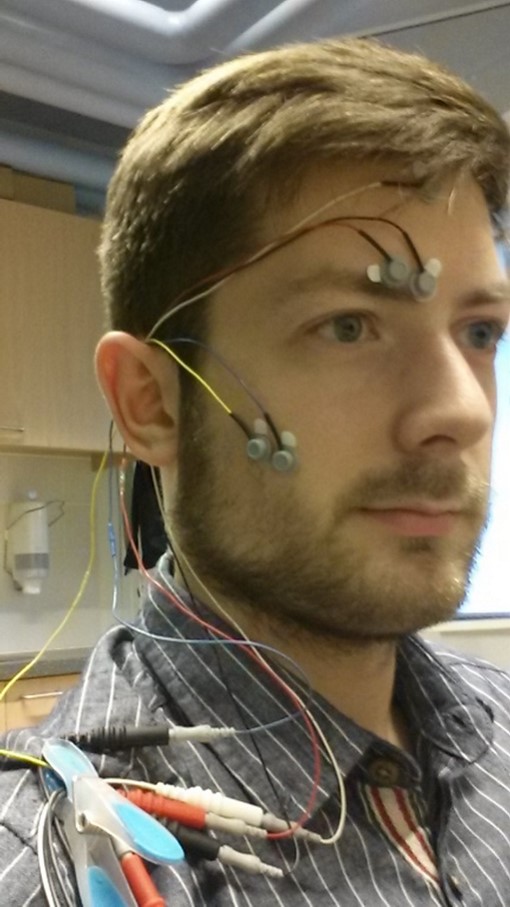
- Clean the circled areas with some alcohol on a cotton pad. The electrodes are placed on the right side of the participant’s face (> left side from the perspective of the participants).
- Place the sensors in the following order:
- [OPTIONAL: BVP: Put the sensor on the index finger. The cable should be at the back of the hand.]
- Reference electrode: First apply gel to electrodes, then remove white cover. There should be a little ‘bump’ of gel when looking at the electrode sideways. Place the electrode in the middle of the participant’s forehead, right above the nose, 1 cm under the hairline.
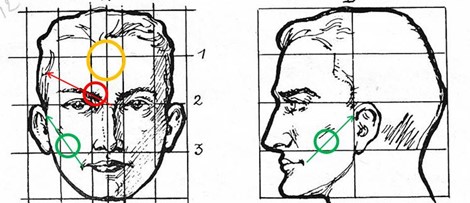
- Frowning muscle (m. corrugator supercilii): It is important that the electrodes are placed as close to each other as possible, without the electrodes or electrode stickers touching each other. Make sure the edges of the electrode stickers are cut at the side facing the other electrode! Apply EEG gel to the electrodes and remove the white cover. Place the electrode on an imaginary line from the upper side of the nose to the eyebrow. Place two electrodes on this line at the start of the eyebrows, as close to each other as possible (see red line and circle). Start with the black one at the start of the eyebrow and put the red one slightly higher.
- You can ask the participant to frown to help you identify the correct placement, but do not place the electrode while the muscle is flexed.
- Smiling muscle (m. zygomaticus major): Again, make sure the edges of the electrode stickers are cut at the side facing the other electrode! Apply EEG gel to the electrodes and remove the white cover. Place two electrodes on the imaginary line from the mouth corner to the top of the ear, at the level of the underside of the nose and as close to each other as possible (see green line and circle). Again, start on the inside of the face with blue and place yellow slightly higher to the side.
- You can ask the participant to smile to help you identify the correct placement, but do not place the electrode while the muscle is flexed.
- Press lightly on the electrode to ensure you have not applied the electrode onto the cheekbone or jawbone.
- Recruit only (male) participant that do not have beard growth above the imaginary line from corner of mouth to top of ear.
- The EMG-TP cable splits into two sets of TP wires, each set consisting of one red and one black wire. When using the ILS Labs screen in BioTrace+, the set with the wire bundler marked ‘1’ should connect to the black and red electrodes (in the black and red wires respectively) on the corrugator muscle. The set that is marked ‘2’ should connect with the electrodes on the zygomaticus muscle (blue and yellow electrodes in the black and red wires respectively).
- Fasten the cables of the EMG sensors via the participants’ right ear to the participants’ clothes on the shoulder using a clothespin. Fasten the cables behind the black/red/white connecting piece of the TP cables.
- Check that the participants are comfortable. There should be no tension on any of the cables and ensure that none of the cables are in their field of vision. The EMG-electrodes should look like this:

- Participants may now put their glasses back on, carefully.
- Switch on the NeXus and Trigger Interface (for Trigger Interface, press button down longer until led-light stays on constantly).
- Acquisition laptop: In BioTrace+ NX10: load screen > UiL-OTS > fEMG likloostra > Record new Session
- Check the signals if all measures are functioning. Ask participants to smile or frown to check placement and responsiveness. Eventually, take a screenshot (Ctrl+Print Screen) if something is other than usual. Correct the sensor placement if necessary.
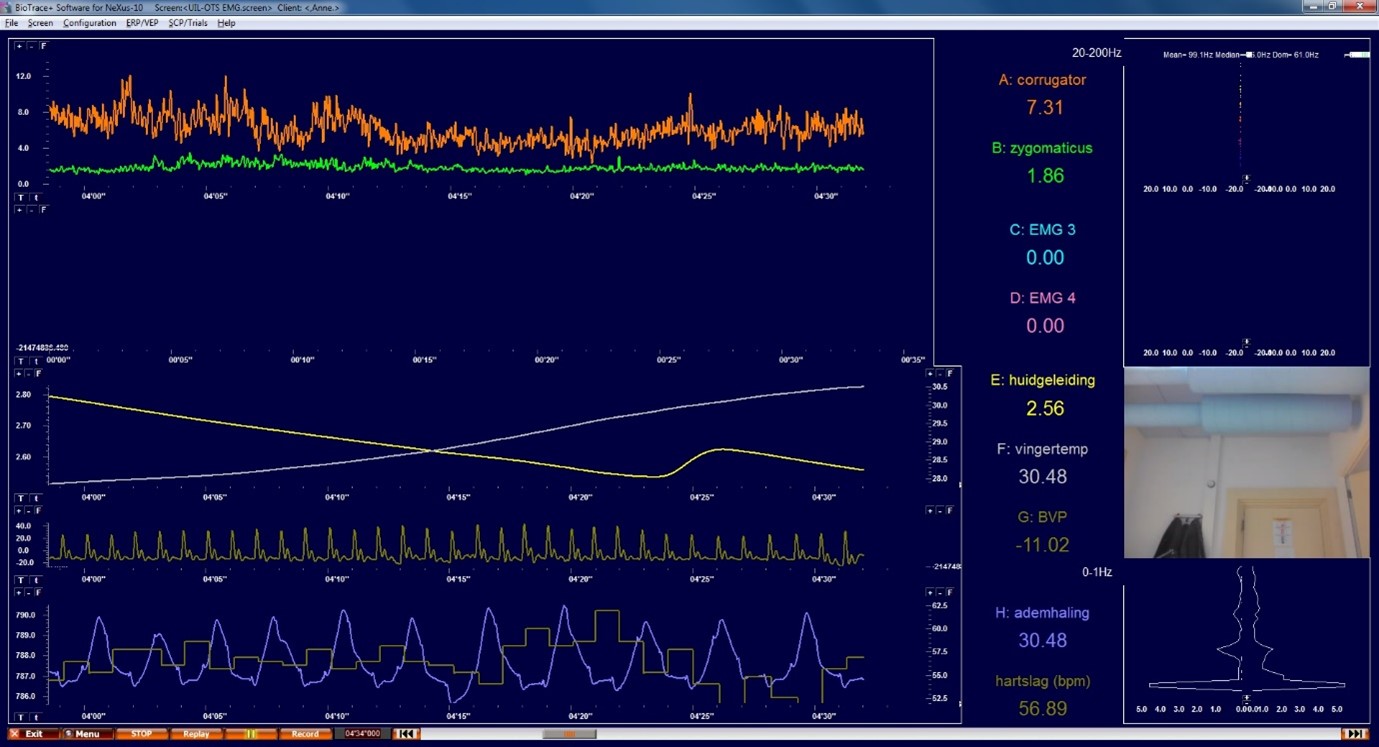
A normal signal should look like this.
- Start the experiment on the presentation laptop.
- Use Tab to toggle session overview with triggers. Triggers will not always reliably show up on the monitoring screen. Any “invalid triggers” will show up red, make note of this for data processing.
After the experiment
- Stop recording in BioTrace+ NX10 (STOP in the bottom left corner of the screen).
- Click on “Save as”.
- Stop Trigger-interface: press the on/off button for 2 seconds until the light turns red.
- Remove the sensors and remove the gel from the participant’s face.
- Let the participant wash his hands to remove remaining SC gel.
- Clean the electrodes, see below.
- Export test session data:
- Go to File > Export Session Data
- Select the relevant EMG channels (on the right)
- Time settings:
- Export ALL data (entire session)
- Output options:
- Type of DATA: All Data Samples
- Output Rate: 2048 SPS
- Output Format: EDF+ format
- Additional options:
- Include TIME (as sample intervals)
- Include EVENT markers (not segment markers)
- Press ‘OK’. Save file with PP ID as name in the folder C:\BioTrace+ NX10\Export\EMG4export.
- Gently clean the EMG and SC electrodes with a baby toothbrush and lukewarm water.
- Dab the electrodes gently dry with a paper towel.
- Hang the electrodes in the blue electrode bag next to the sink.
- Clean the syringe with (luke)warm water and a bit of soap. Make sure that the tip is completely clean by scrubbing it and filling it with soapy water and pushing it out. Repeat 2 or 3 times.
- Charge the NeXus battery. The battery is charged when the green light is off.
- Charge the trigger interface 9V batteries. Always make sure there are two charged batteries available.