
How-tos
Running an experiment with the SMI software
If you have suggestions on how to improve this document, or find mistakes, please send them to ilslabs@nulluu.nl
Introduction
This page aims to give some quick pointers to running your own experiment with the SMI RED250mobile eye tracker and SMI’s own software. This setup can be used for usability research, to answer questions like ‘how do people navigate a particular website’ (web stimulus) or ‘how do people use a particular bit of software’ (screen recording). For reading experiments, and for VWP experiments, it usually will be better to use ZEP – see the howtos VWP experiments with the SMI under Windows and Reading experiments with the SMI under Windows.
NB: SMI will not give any more support on either the hardware or software, so when either stops working, there will be no easy fix.
This page is always under construction. If you find mistakes or have things to add, please send them to Iris Mulders.
Support and lab etiquette
- Contact Iris Mulders or Maarten Duijndam to
- discuss your experiment design
- discuss which eyetracker and software best suit your needs (also see SMI vs. Eyelink)
- plan a tutorial on how to use the equipment.
- Read the Introduction Guide to ILS Labs and follow all the steps there to create the user accounts etc that you will need. (NB: your solis-ID does not need to be added to the lab user group to use the SMI laptop, but it does need to be added if you want to use the ILS Labs data server ).
- In the time period that you are working on your experiment, attend the eye-tracking lab user meetings.
- The SMI laptop is primarily meant for running experiments; in as far as possible, you are expected to do your experiment preparation, and your data analysis, on other computers, outside the eye-tracking lab (for instance in our practicum room K.06, or at home). Use the ILS Labs data server to safely store your data, and to access your data on other computers.
- Always report any problems to lab support immediately: go to room 0.09 on the first floor, or alert the support staff by email or phone.
Reserving equipment and lab opening hours
- For details on lab opening hours, see this page.
- You can reserve the SMI eyetracker (includes laptop) and the experimental booth cabin 6 in the reservation system. Don’t block whole weeks, only reserve the timeslots that you will actually use the equipment (and the lab). Please unreserve the timeslot if an appointment is canceled.
- Always arrange precise pick-up times for the SMI with the lab technicians in room 0.09. Let them know if you need extra equipment, like the external monitor, mouse, external keyboard (we have an extra small keyboard), a USB hub, etc.
- In busy times, we will coordinate reservations in the eye-tracking lab user meetings.
Equipment: architecture of the set-up
The SMI RED250mobile eye tracker samples both eyes at 250Hz, using infrared video based tracking technology. Freedom of movement is 32 x 21 cm at a 60 cm distance; gaze position accuracy is 0.4 degrees.
For a full technical specification of the SMI RED250mobile, see their product flyer. Monitor resolution of the SMI laptop is 1920×1080.
The SMI setup consists of a laptop (running Windows 8), and the eyetracker itself, which is connected to the laptop through USB. The whole setup fits into a flightcase. We also have a small flat external USB-screen that you can use to monitor the participant’s gaze during the experiment (that does not fit in the flight case).
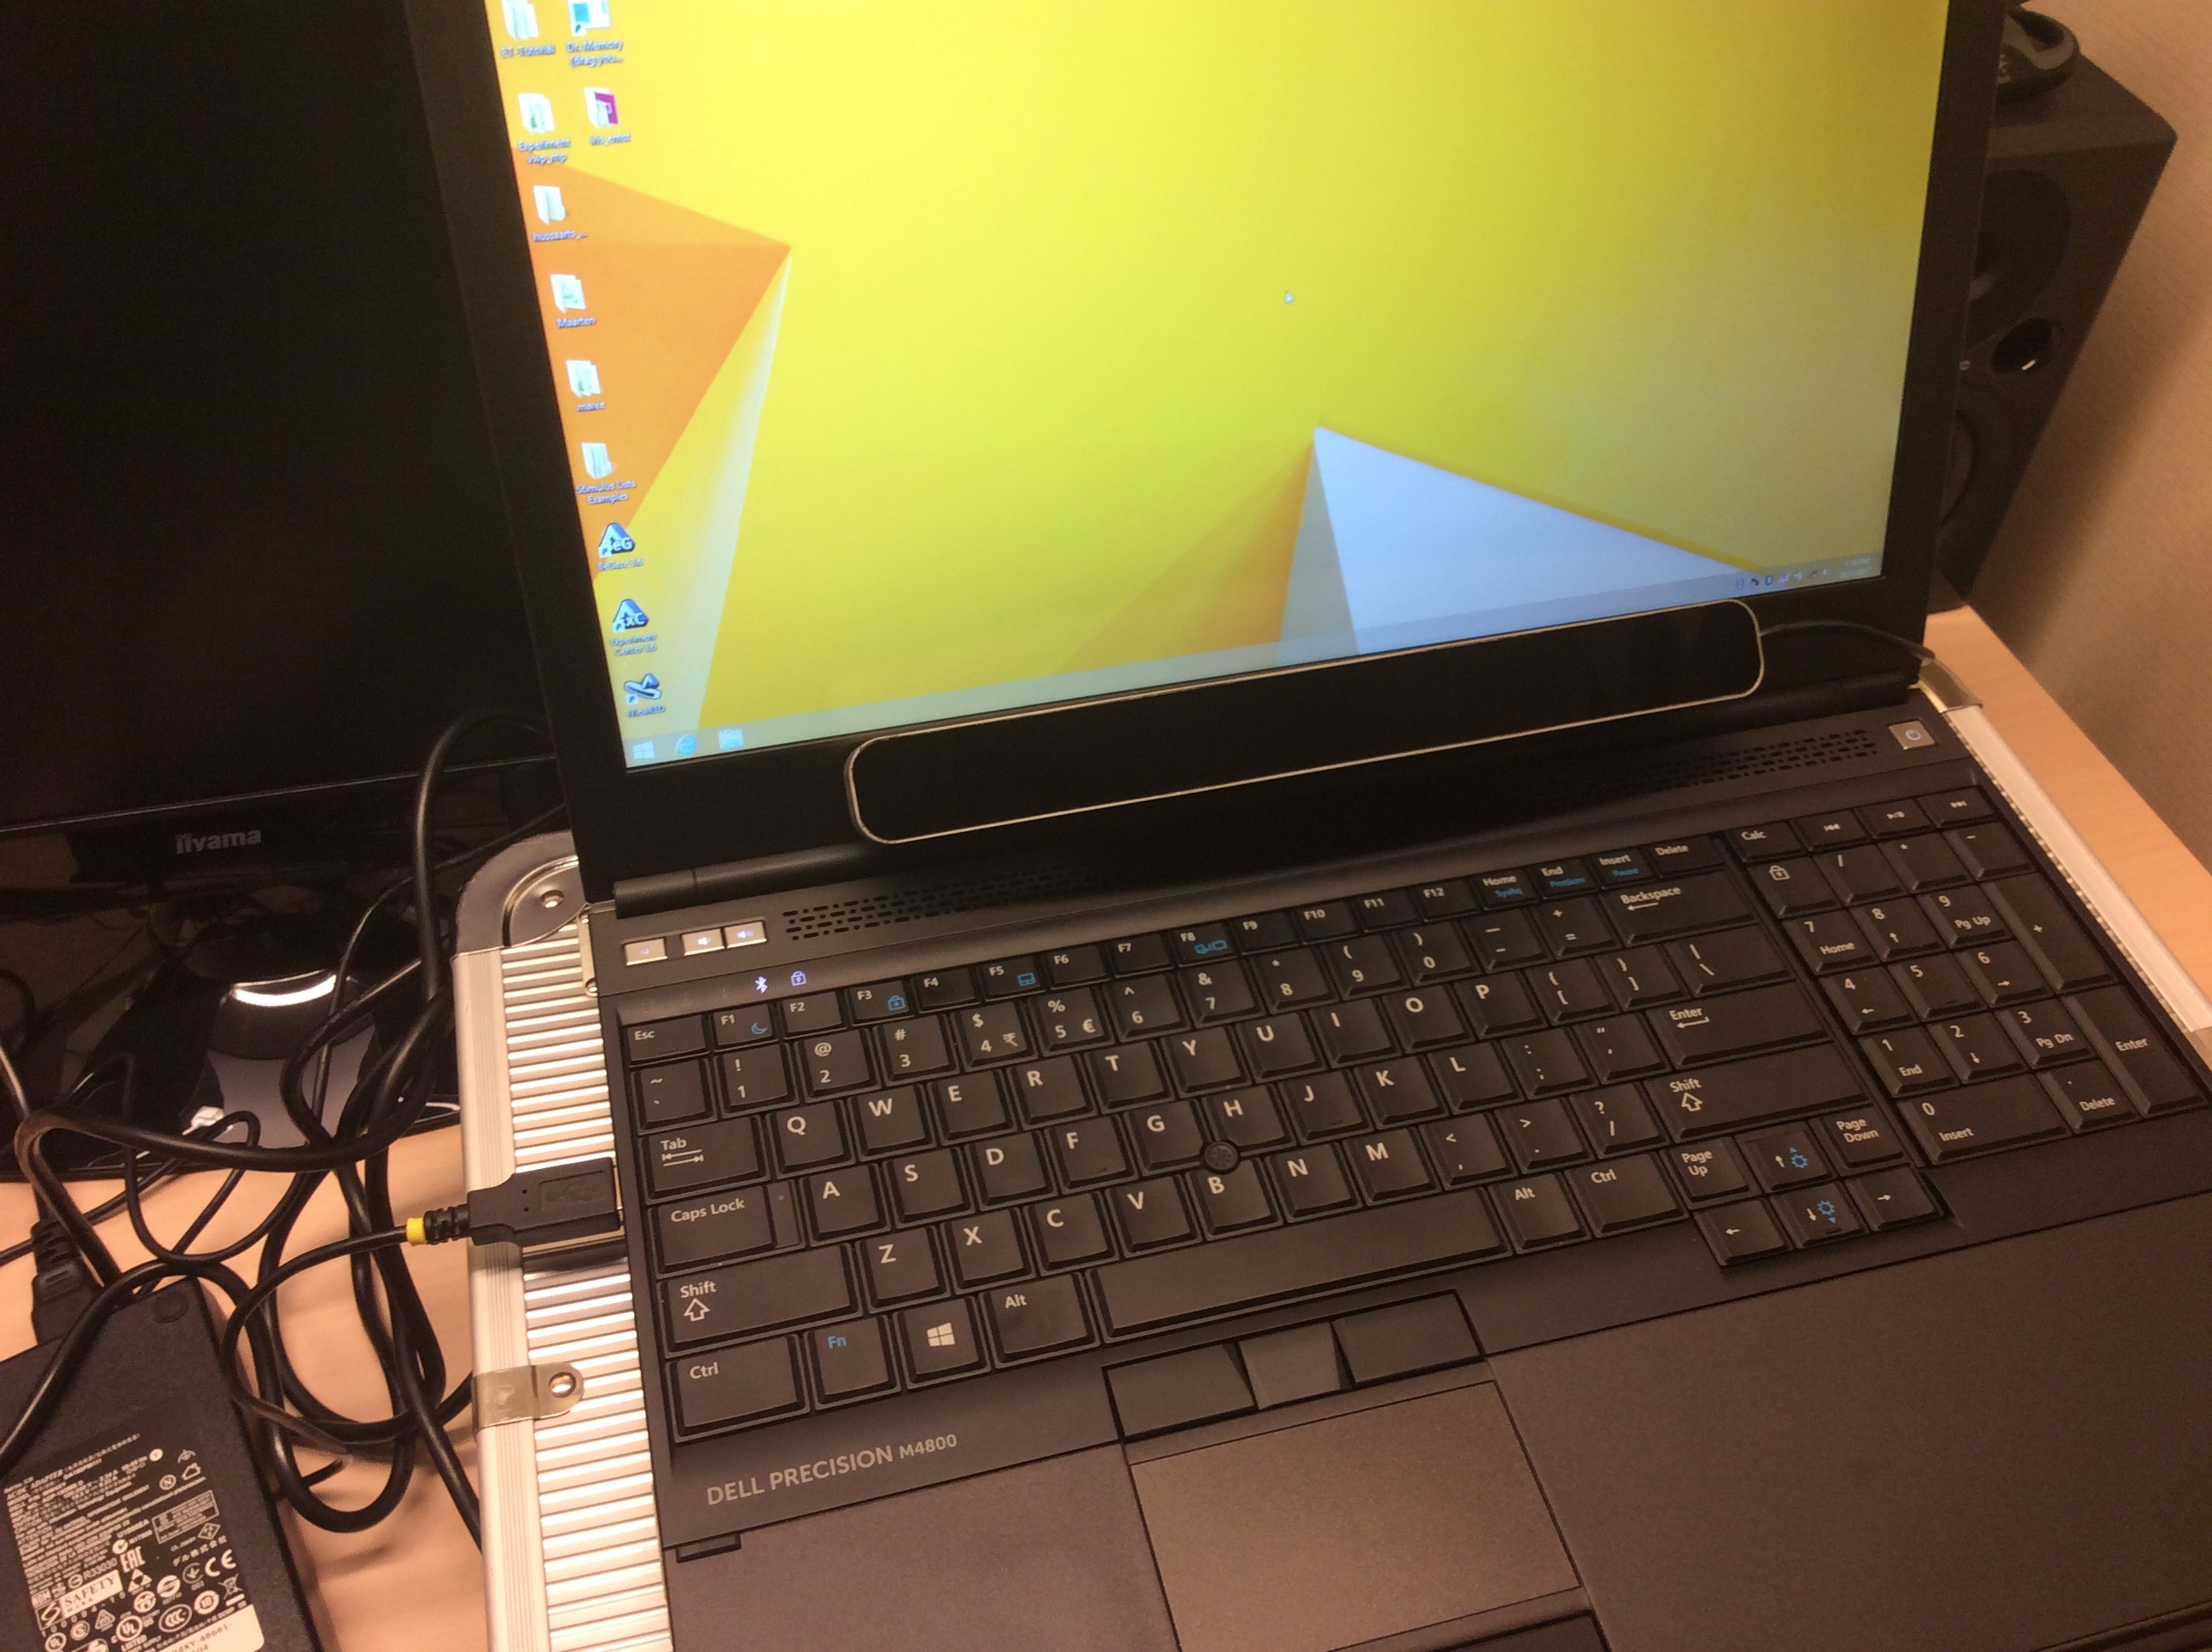
SMI laptop with SMI eyetracker on top of flightcase, in K.12 cabin 6
Set up and pilot your experiment on the SMI laptop
Switch on the equipment
- Switch on the SMI laptop. Always keep it on the charger to avoid running out of power mid-experiment.
- The laptop will boot in Windows 8; you don’t need to log in.
- Click the eyetracker on to the laptop. Make sure you hear the magnetic thingy ‘click’ into place. Make sure you use it right side up (cord on the right side of the eyetracker).
- Plug the USB eyetracker in in the port labeled ‘RED’ (the cord crosses over to the USB port behind the screen).
- When the LED lights come on in the eyetracker, it’s working. (If not, the lights will probably come on when you start the iVNGRED Server, see below).
- Optional: connect mouse and/or external keyboard.
- Optional: we have a small external USB screen that can function as an experimenter monitor, to allow you to follow the participant’s gaze during the experiment, so that you can correct their position during the experiment if necessary. Connect it on the right side of the laptop. If necessary, you can plug in the extra, short USB cable from the external monitor for extra power (so far, we’ve never needed to). Note: the Windows settings on the laptop should be such that you can plug in and use the extra screen without issue, but in case they’re not: you can change the Windows display settings using the nView Desktop Manager; the laptop screen should be the primary monitor and the extra monitor the secondary monitor. (Note from Iris: it could be that this is the other way around if you use the SMI with ZEP. If you get confused about any of this, ask a technician in 0.09 for help.)
Start and use the SMI software
- Now start the SMI tracker software. This software needs to run in the background for the eyetracker to work.
- Press the Windows button to get to the Windows-8 tile menu.
- Double-click iVNGRED Server. The software will start and the icon will appear in the services taskbar.
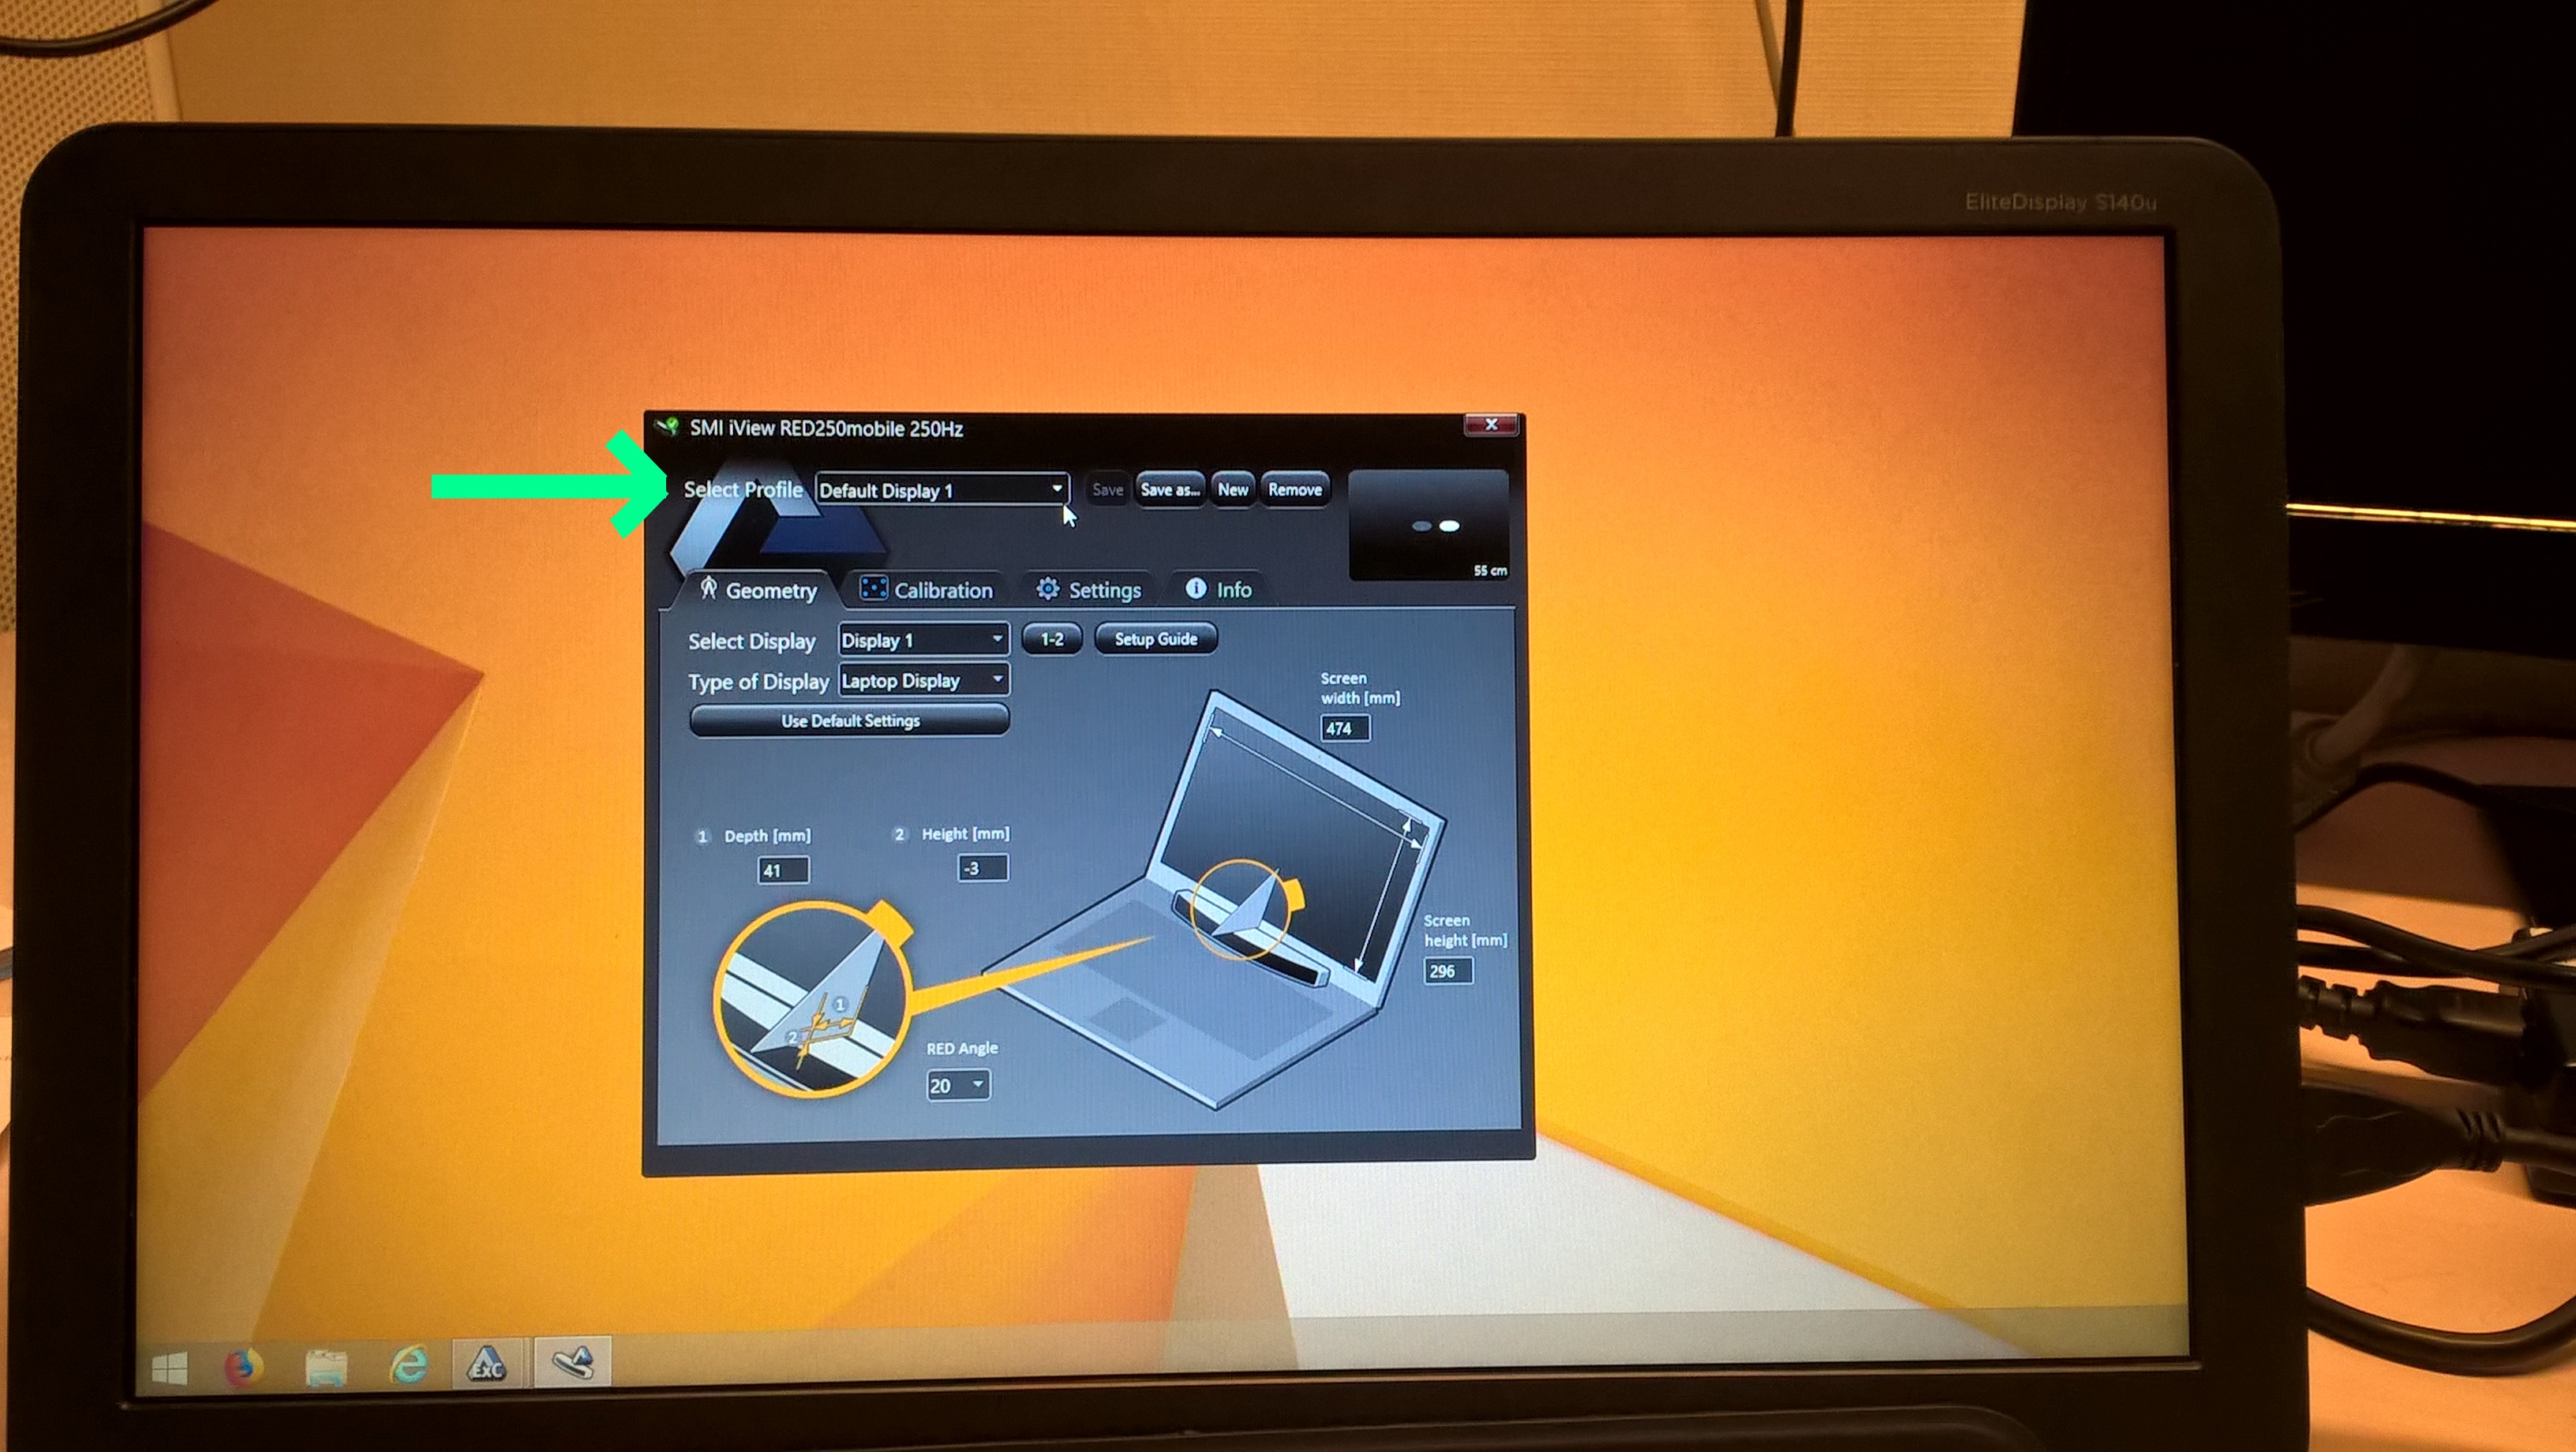
- If you’re using the extra monitor, you will want to see the window that shows the participant’s eye movements. To get this extra window to appear, click the IviewRED icon on the desktop. Drag the window to the second monitor. In this window, choose Select Profile -> Default Display 1.

Eye movement monitoring window on secondary screen – click to enlarge
- Plug the blue dongle into a USB port on the laptop.
- Start Experiment Center. A window will pop up asking you ‘Do you want to allow the following program to make changes?’. Click yes.
- Create your experiment. Ask Iris for advice, and see the Experiment Center manual. The program itself has a help function too. For pointers specific to using web stimuli, see below.
- NB: you will have to lock the experiment to be able to run it.
- NB: it’s a good idea to set up the calibration so that you have to press the space bar to start it.
- Validation (for the calibration): the best option seems to be to choose ‘Properties -> Quality check’ and select ‘Validation’ as an option. The participant will get 9 points consecutively, 5 for the calibration and 4 for the validation (you will not need to hit the space bar to start the validation separately). As feedback you’ll get the validation screen with errors, and you’ll be able to decide whether to redo the calibration based on that information.
- If you need internet for your experiment (in the lab), use the Eduroam network. (Note: there’s a manual switch at the right side of the laptop that can be used to switch to airplane mode – if wifi isn’t working, check this switch).
- To stop the recording, use F12 (this cancels the recording, you will be prompted to save the data), or Alt-F4 to quit the browswer/other software you’re researching, or F11.
- You can view and analyze the data in the SMI BeGaze software. Press the BeGaze icon in the bottom right of the Experiment Center screen to easily transfer your data to BeGaze. See the SMI BeGaze manual.
- Note: You can also import your data in BeGaze by hand as follows: in BeGaze, choose ‘New experiment from folder’ and navigate to the folder C:\Program Files (x86)\SMI\Experiment Suite 360\Experiment Center 2\Results\YOUREXPERIMENT. This is very annoying though, and you’ll need to reimport ALL your data every time you want to see data for a new participant.
Measuring web stimuli
Some notes specific to measuring web stimuli:
- Sometimes the browser will (when it starts up) present a reCAPTCHA for the participant to prove that he/she is human. This is problematic because it takes extra time, distracts your participants, and also you will not see this in the gaze replay (the reCAPTCHA element is not present in the gaze replay for the web stimulus, you’ll just see emptiness in your stimulus where the reCAPTCHA was). It looks like the reCAPTCHA problem depends on which wifi network you are on and which browser you are using: the problem seems to not occur much when you are using the Eduroam network, and less in Firefox than in Internet Explorer.
- If you use web stimulus with the option ‘background screen recording’, the whole screen will be captured during the experiment and saved as a separate .mkv file. This file does show all web elements, including web elements that are not visible in the replay (such as the reCAPTCHA element mentioned above). We’re not sure if this screen capture can be combined with the eye movement data. (If you choose screen capture as the stimulus type (rather than web stimulus), then you can for sure do gaze replay and see the screen as the participant saw it, but this takes away the advantage in the analysis that the web stimulus does give you, such as separate scenes/pages when the participant navigates to another web page).
Switch the equipment off (when you’re done for the day)
- Switch off the laptop. Make sure it is not just sleeping, but actually turned off! If it’s still on when you put it in the flightcase, it may catch fire.
- Disconnect the eyetracker and the external USB screen.
- Put the laptop and the eyetracker neatly into the flightcase.
Bugs/known issues
- The SMI will sometimes stop measuring altogether if it’s been measuring for a while, without warning. You’ll only find out because you’ll have no data. The solution seems to be to frequently restart the laptop. (Every hour seems to work fine, maybe less often is OK too).
- Error “Medialooks screen capture direct show filter: your license has expired”: this error seems to come up if you run Experiment Center from the extra USB-screen. Solution: don’t do that ;-).
- Quite often, the calibration/validation will not show any feedback in the extra window on the secondary screen. Solution: restart the entire laptop.
- The analysis program BeGaze will quite often stop responding. Solution: restart the program.
- Problems can occur with the secondary screen not displaying the eye movements (sometimes not even recording data). We don’t know what causes this. If you have a step in your experiment where you need to press enter to get to the next point, and the experiment goes to the next point by itself (without you pressing enter), that seems to guarantee that you will get these types of problems, so in that case it’s best to just break off the experiment and start the software again.