
How-tos
Running an EEG experiment: Implementing your Experiment
If you have suggestions on how to improve this document, or find mistakes, please send them to ilslabs@nulluu.nl
Implementing your EEG experiment
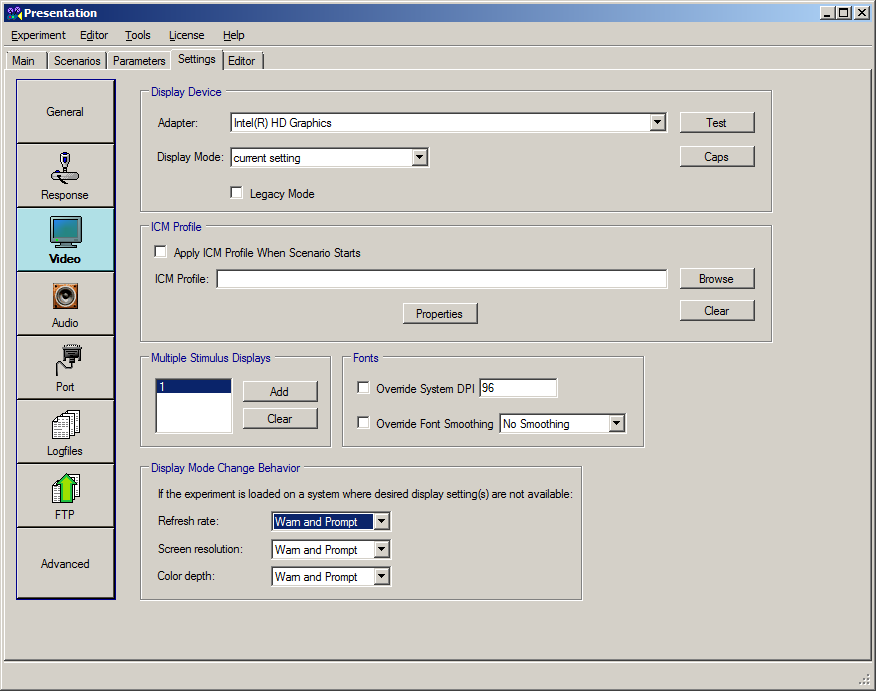
The EEG experiments in the lab are run in Presentation. We offer limited support in programming Presentation experiments, but below are some screenshots of the settings you will need for a Presentation experiment to work in the EEG lab:
 |
 |
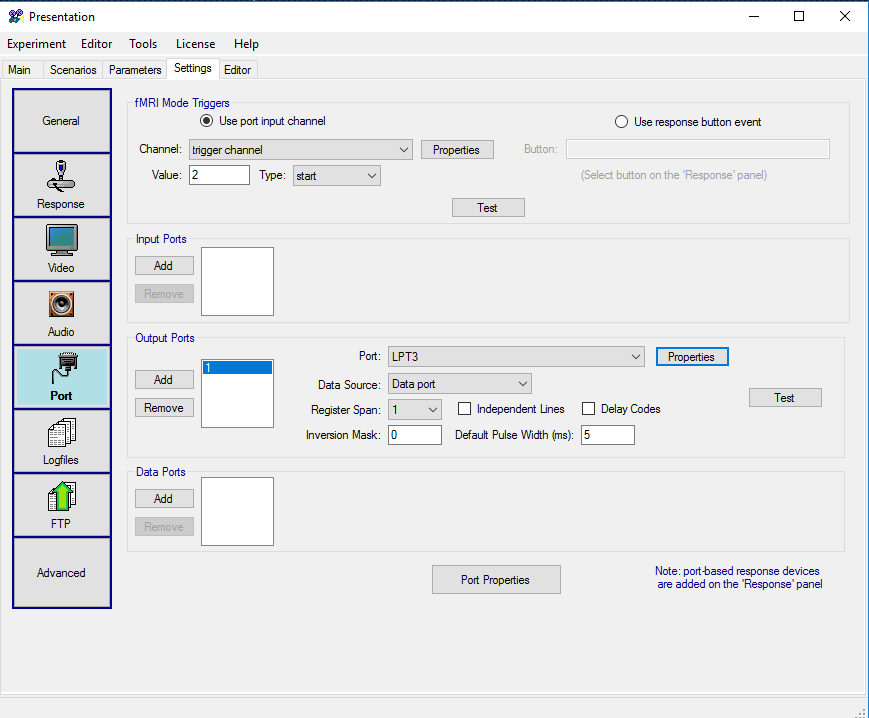 |
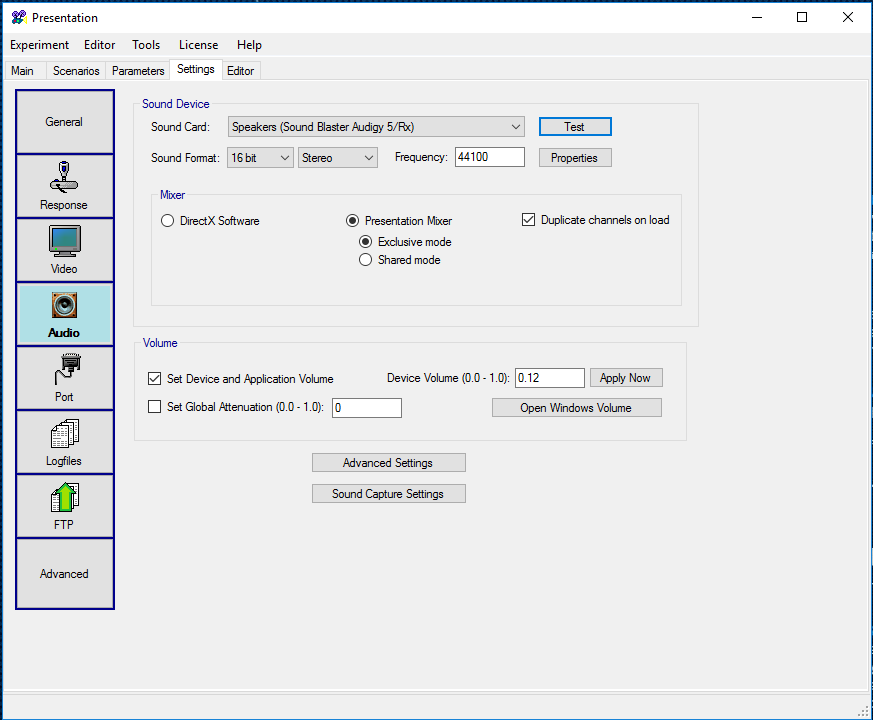
| Video settings | Audio settings | Port settings for Markers/Triggers (ignore Input Port Settings) |
Video note 1: occasionally after the system has been booted in Linux there is an issue with the order of the monitors, the experimenter and participant monitor may be switched. To solve this issue go to the Video settings and then in Display Device > Adapter: choose the “Primary” option instead of “Intel(R) HD Graphics”, or the other way around. This should solve the issue.
Audio note 1: there is a constant latency of 0.6-0.7 milliseconds in the presentation of sound stimuli with this setting (with <0.00 ms variability). This is the lowest and most consistent latency you can manage with these machines, so make sure you use these settings. This size of this time lag is easily negligible on the human scale of perception. You can reduce this further by setting the sample rate to 192kHz but this will induce a minor amount of latency variability (~0.05ms).
Audio note 2: make sure you tick the volume options ‘Set Device [..] Volume’ to a value around 10%. The volume at 100% is VERY LOUD! Always check your volume with the dB SPL sound meter!
Audio note 3: Presentation bug: Presentation can (rarely) be too slow loading in audio stimuli under Windows 10 (error involves ‘audio-buffer underrun’). This entails that Presentation can’ t access the audio file quick enough; the experiment will crash upon this error and stop. (You can tell Presentation to continue the experiment by switching off the Advanced audio option ‘Halt On Mixing Buffer Underrun’, but that doesn’t help much as the subsequent audio files following the error will sound strangely robotic). A possible solution is prefixing the sound-stimuli event by a visual-stimuli event (e.g. a default fixation cross). This works because Presentation only starts loading the audio buffers just before the start of a trail containing audio. The presence of a non-sound event of duration ~500ms then gives ample time for loading buffers. An alternative solution (for if this error shows up during playback of audio) is to to increase the “Exclusive Mode Buffer” size in advanced-audio options (e.g. to 20ms). This might affect the audio onset but only if you start a trial with a sound-stimulus event, otherwise it should have 0 effect on the onset timing.
Keyboard response device
To use the keyboard as a response device:
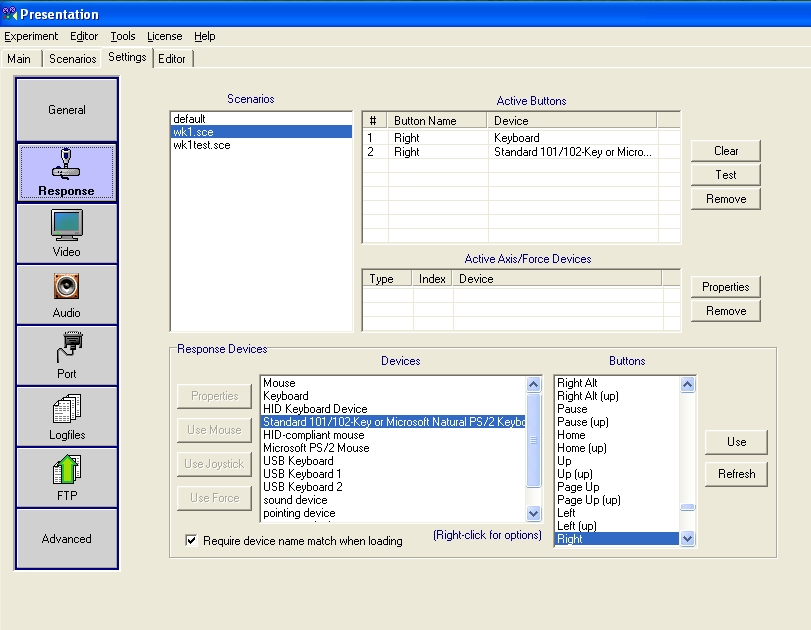 |
| Response Settings |
Example EEG script using the keyboard as the response device
Button box response device
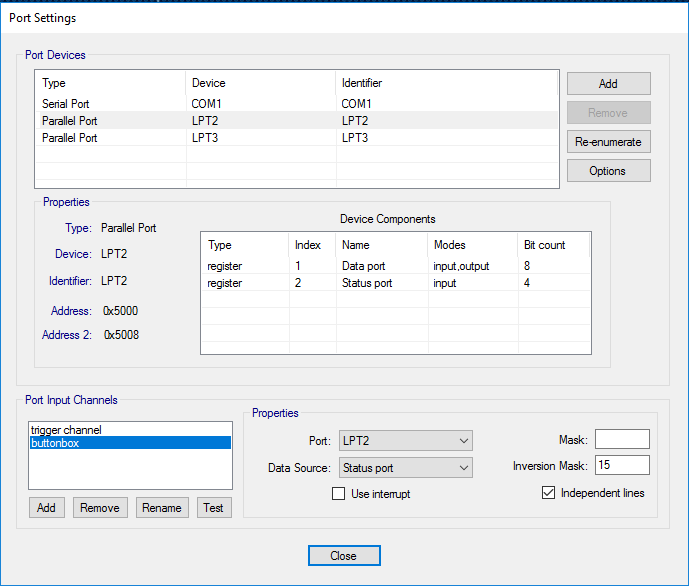
To use the button box as a response device, you first need to set up the parallel port (LPT2). Then specify the button box as the response device: right-click the devices box to add the button box.
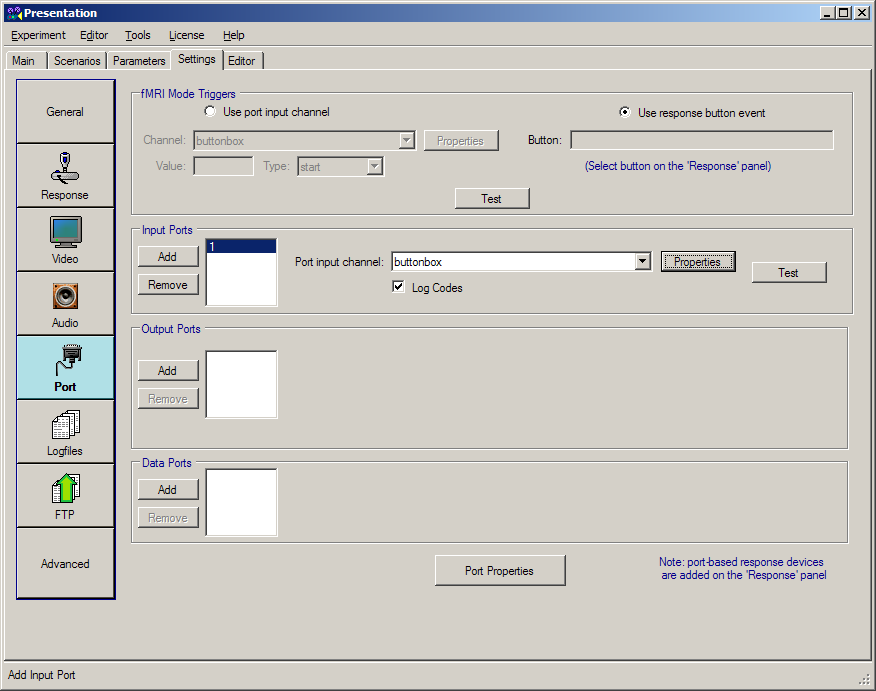 |
 |
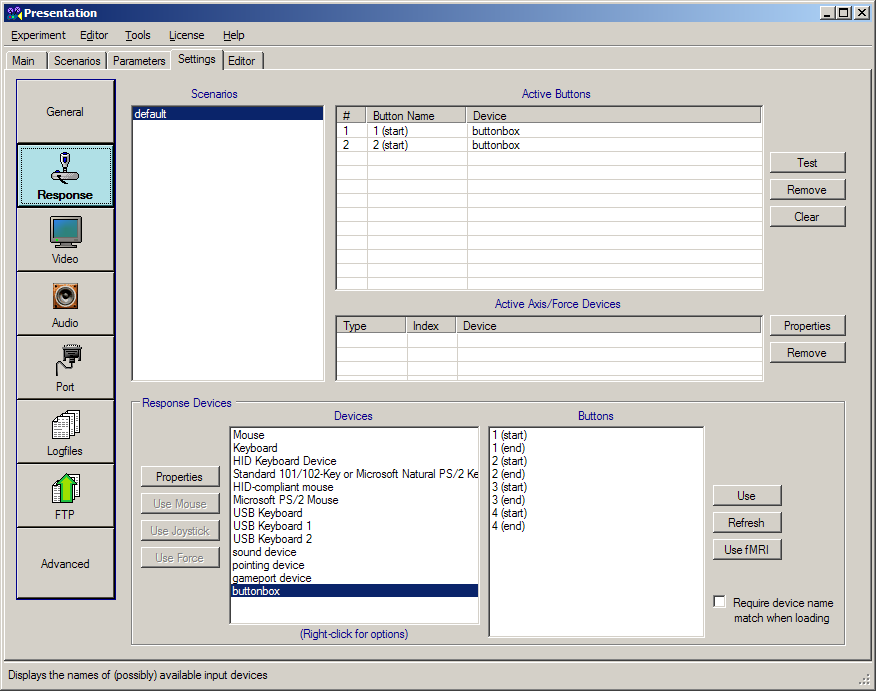 |
| Add port for button box | Port settings for button box | Response settings for button box |
Use the ‘test’ button to check that it works and to see the response codes.
Extremely simple example script (not EEG) using the button box
Audio
You can use headphones to listen in on the experiment in the control room; plug them into the plug labeled ‘phones’. Control the volume by using the switch labeled ‘phones’ at the bottom of the panel.
There are currently two audio systems installed. The in-ear tips and the Tangent boxes are connected to a dedicated amplifier (one each) in the researcher room. Each of the amplifier is connected to the audio switch which act as a selector and is in turn connected to the presentation computer (k13-01). Remember to set the audio switch correctly and turn on the correct amplifier! The amplifier for the ear-tips has an additional input possibility via a 1.5 mm audio jack connector (e.g. a MP3-device).
Recording audio is possible via the sound mixer. It is wired to feed the main output to the k13-02 computer. (Due to very limited usage it is likely that the configuration needs some tweaking before it correctly records; please ask for support-group assistance in 0.09 if you plan to record audio.)