
How-tos
Recording Audio with the Lexicon Omega
Last updated on 3 September 2015 by Jan de Mooij
If you have suggestions on how to improve this document, or find mistakes, please send them to ilslabs@nulluu.nl
The Lexicon Omega is a digital audio interface for your computer. You can connect up to two XLR microphones and/or 4 Jack cables to it, which you can all record from simultaniously. It’s relative low complexity, its sturdiness and its good audio quality make this a useful device for recording audio.
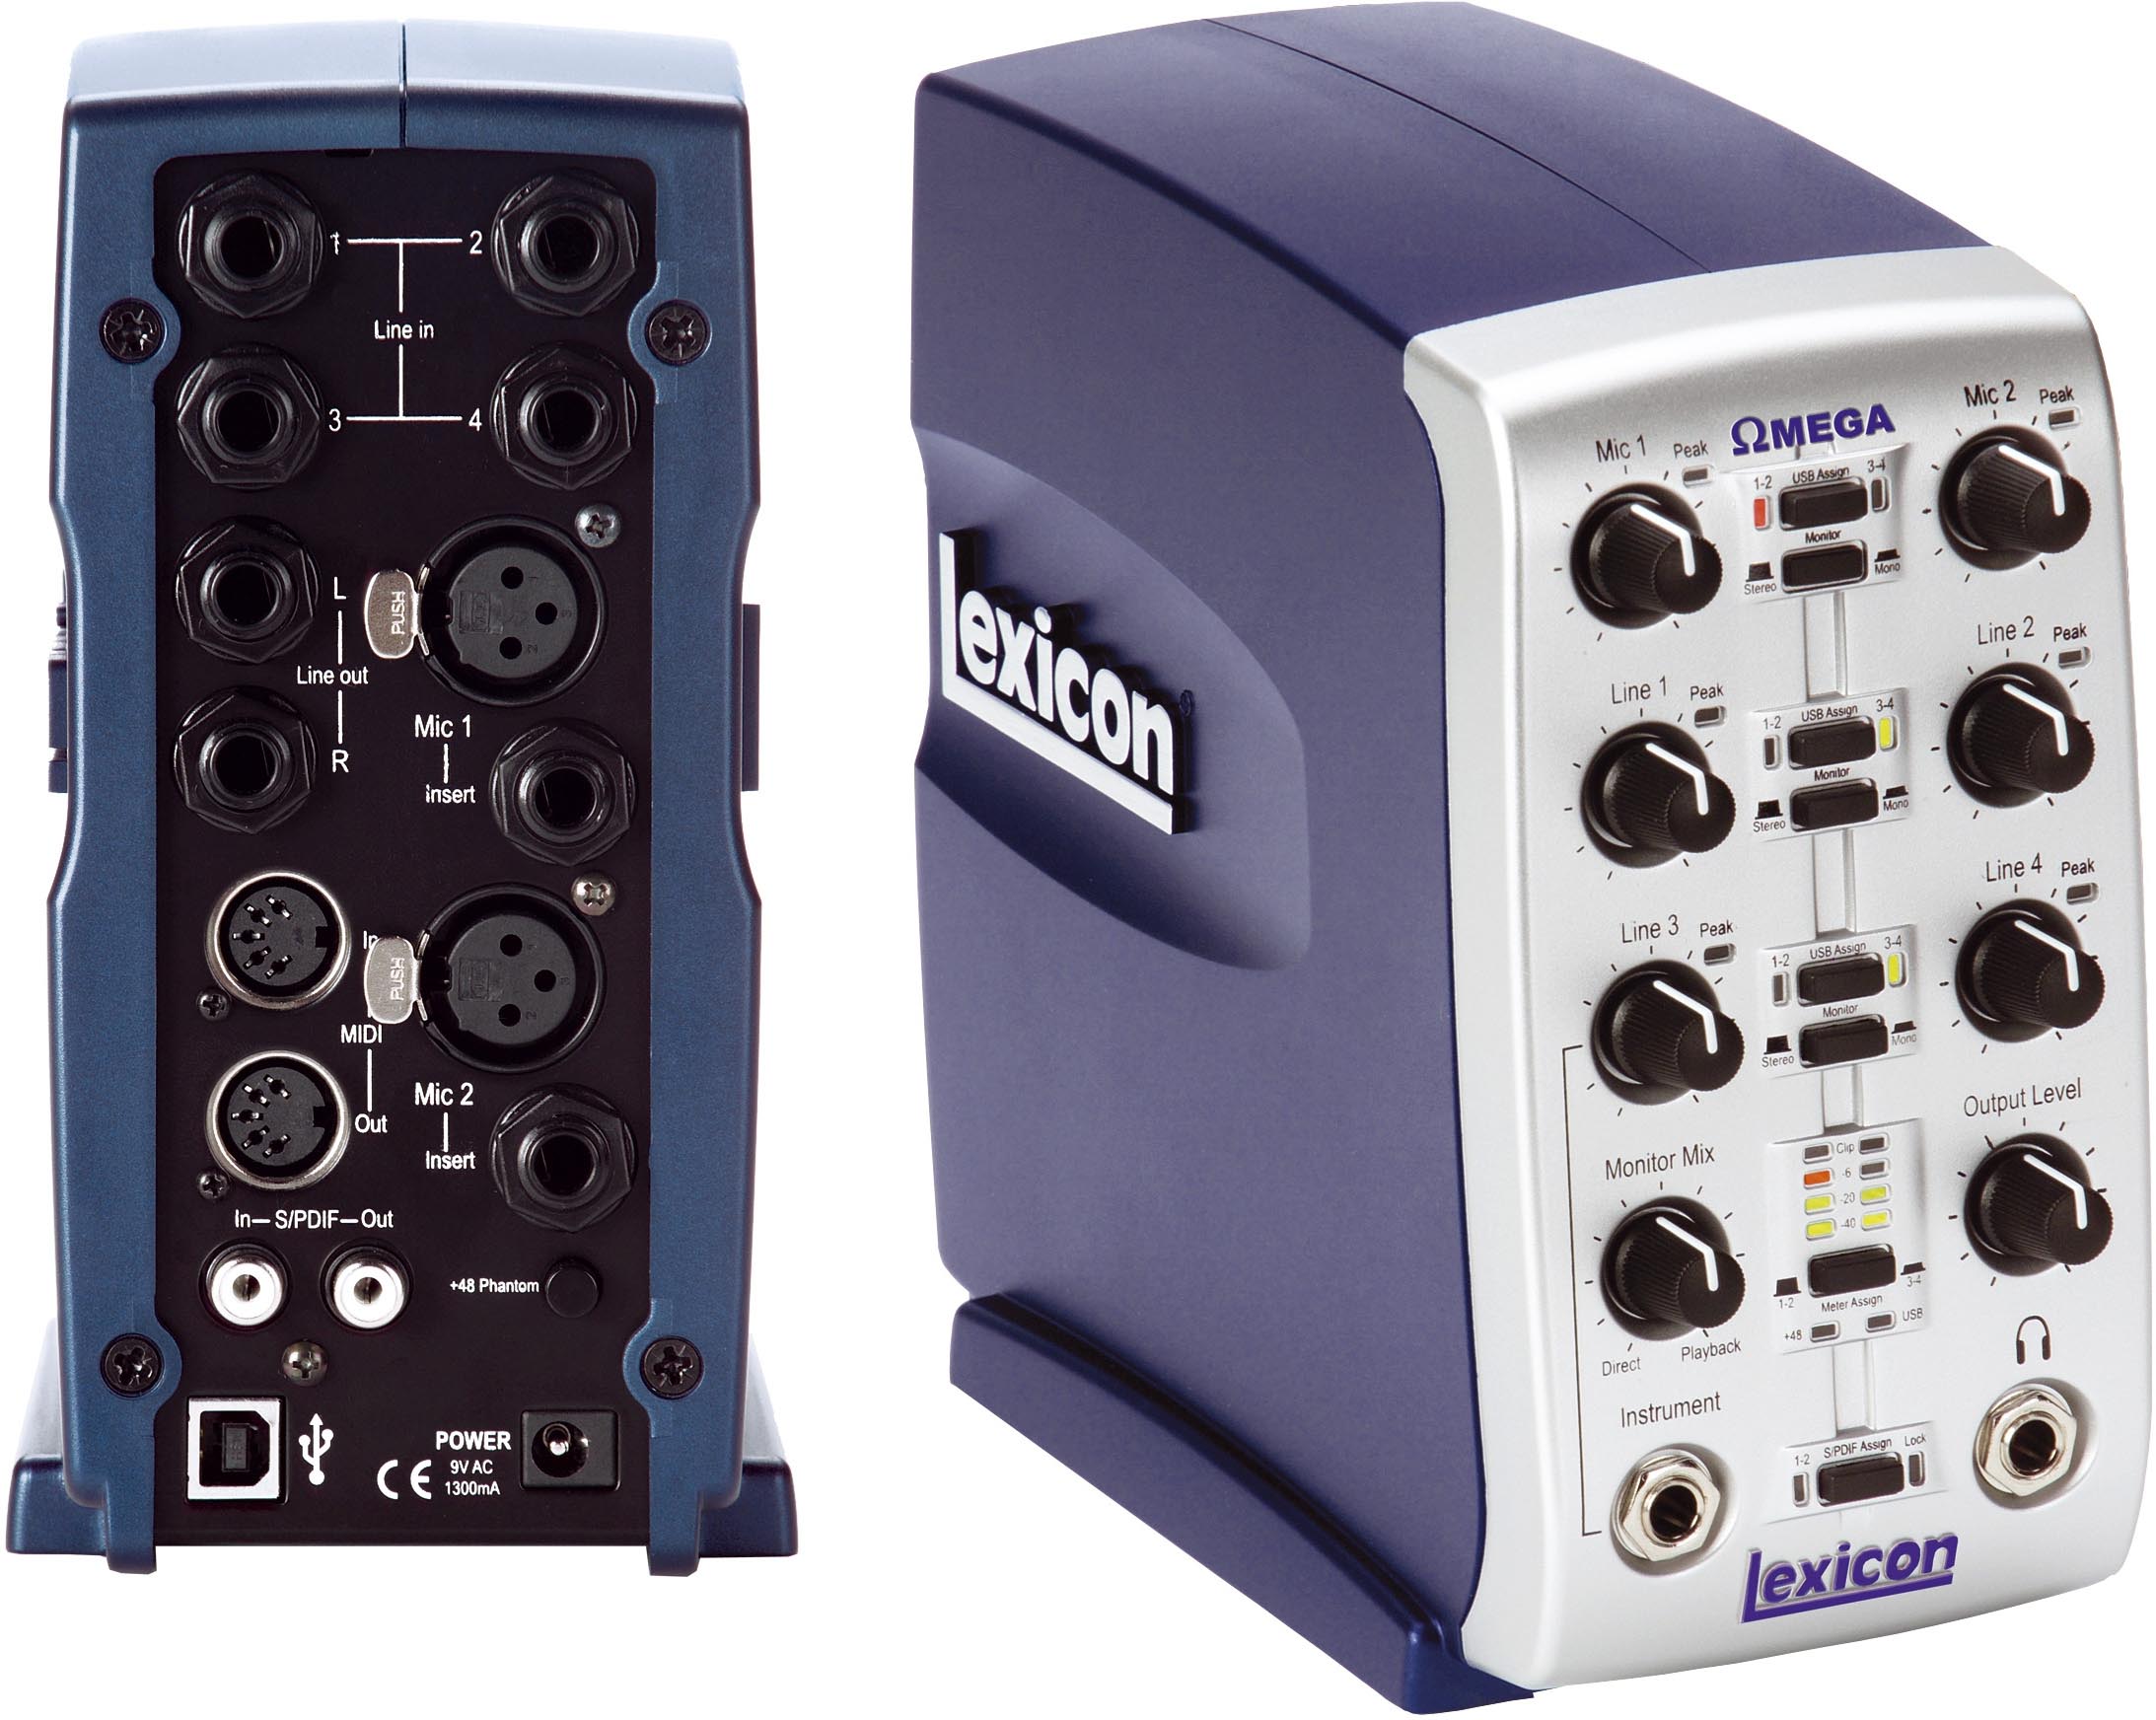
The Lexicon Omega digital audio interface
- Use the USB cable to attach the Lexicon Omega to your computer. You will find the USB socket on the bottom left. Linux users, beware.
- Attach the power cable to the Lexicon Omega. The power port is on the bottom right of the back of the Lexicon Omega
- Plug in the adapter to a power outlet. This will start the Lexicon Omega
- Decide how many and which microphones you want to use. You can use up to six channels at the same time, but the mixer only sends 4 channels to your computer. To facilitate all six channels being recordable at the same time, the Lexicon Omega mixes some of the channels together, meaning that you cannot edit the seperate tracks anymore, after you made the recording.
Never use microphones that do and don’t require +48V phantom power at the same time. - Connect the microphones either via Jack or via XLR. It’s best practice to place the most important microphone at channel 1 of that type (the XLR inputs have type ‘mic’ and the jack inputs have type ‘line’). If all of the microphones are equally important, try to use the first channels first. You can connect them via the back of the Lexicon Omega.
- If your microphones require +48V phantom power, use the +48V button on the back, right above the power supply, to enable it. If your microphones do not require +48V phantom power, make sure to disable it. If the button is pressed down, it is enabled.
- On the front of the Lexicon Omega, turn all the dials entirely to the left.
- Turn the dial for Monitor Mixto the middle
- Set which microphones are sent over which USB channels.
- If you are using any of the mic inputs, press the button for USB Assign to the left of the Mic 1 dial until the red light on the left of the USB Assign button is lit up. Otherwise, press the USB Assign button until neither the red 1-2 light, nor the green 3-4 light are lit.
- If you are using any of the line inputs, assign those lign inputs to the proper channel using the USB Assign button next to the dials for those inputs. You want to try to make sure none of the channels are used more than once. So if you also use the mic inputs, make sure line 1 and 2 are assigned to channel 3-4 (the red light on the right hand side of the USB Assign button for those inputs).
- Set the gain for each of the inputs. For each of those, do the following (don’t touch the other input gains anymore):
- Press the Meter Assign button in between the Monitor Mix and Output Level dials, to match the assigned USB channels for that channel from step 6 (pressed down they align with USB channels 3-4 and not pressed down to 1-2).
- Place the microphone on such a distance of the sound source you want to record as you will do during the recording and have the sound source make the same type of sound it will make during the recording (when it’s singing, have the person sing, when it’s talking, have the person talk, when it’s whispering, have the person whisper; just make sure it is the same type and level of sound as during the recording).
- Slowly turn the dial for that input to the right. Whatch the meters. When the third light from the bottom, but not the fourth (red) light from the bottom lights up when the audio is slighly louder than average, the dial is set to the correct position. Continue with the next channel.
- You can use the Output Level dial to ajust how loud you will hear the audio over your headphone. When playing audio from your computer, the sound level is ajusted with this dial as well.
- Open Audacity
- Click input device and select any of the options that start with “Lexicon Omega: USB Audio” that doesn’t have “#1” in the name (Linux) or any of the options that has “Lexicon” in its name (Windows)
- For playback device, select any of the options that has the word “Lexicon” in it’s name
- Click channels and select the first number that is larger than or equal to the number of microphones you are using
- Click record to test if recording works. Say something in all of the microphones.
- Play your new-made recording and check if each of the microphones is audible and of high enough quality for your purposes. If so, you are ready to begin your actual recording
Keep checking everything during recording. Keep listening in. Things might change during the recording and you don’t want to find out afterwards.
Don’t forget to save your recording after you are done.