
How-tos
Experiment Builder on the EyeLink
If you have suggestions on how to improve this document, or find mistakes, please send them to ilslabs@nulluu.nl
Introduction
SR Research Experiment Builder is a program that can be used to make an experiment for our EyeLink 1000 eye tracker. We have one license and the software is installed on ET1; however, we do not generally use it, and it is recommended that you use our own software, ZEP, instead; use of ZEP for EyeLink 1000 experiments has been fully streamlined and documented, see the relevant how-tos.
In general we keep the use of proprietary software like Experiment Builder in the lab to a bare minimum, because it is much harder to manage than our own software: we’re dependent on the company’s good will if there’s anything wrong with it (can’t fix stuff ourselves), it’s not free software, managing the disk space under Windows with multiple users is a pain, and so is keeping track of the license dongle.
In some very limited cases though, use of Experiment Builder may be warranted (confer with the lab manager first); full local support cannot be given, but this document provides information about a few known issues. For other issues, you are on your own; the manual can be found on the resources page.
This page is always under construction. If you find mistakes or have things to add, please send them to Iris Mulders.
Contents
- Preparing and analyzing your experiment
- Using a button box with Experiment Builder
- Fixing the error ‘Could not initialize asio system’
Preparing and analyzing your experiment
Experiment preparation needs to be done outside the lab as much as possible to keep the lab free for actual experiments; for this purpose, Experiment Builder is installed on the PCs in K.06. Display fine-tuning needs to be done in the lab, as the monitors and resolution in K.06 are not the same as in the lab.
For analysis purposes, Data Viewer is installed on all the PCs in K.06.
Using a button box with Experiment Builder
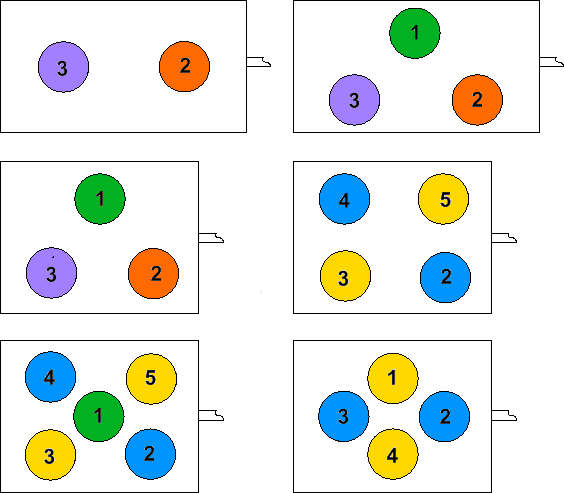
Our button boxes can be used with Experiment Builder; you will need to move the button box cable (gray plug marked ‘3’) from ET1 to the host PC’s parallel port. Take care to not pull on any other cables, and don’t forget to put the cable back into ET1 when you’re done!
See the image on the right for button box layouts (and click it for a larger version).
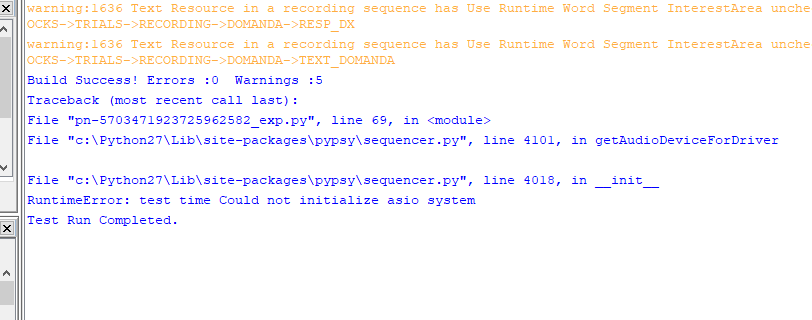
Fixing the error ‘Could not initialize asio system’
Upon initiating your experiment, Experiment Builder may give you the following error if your experiment involves sound:
To solve this, do the following:
- Open the start menu
- Go to SR Research
- Click on “Configure ASIO”
A window with ASIO settings will appear:
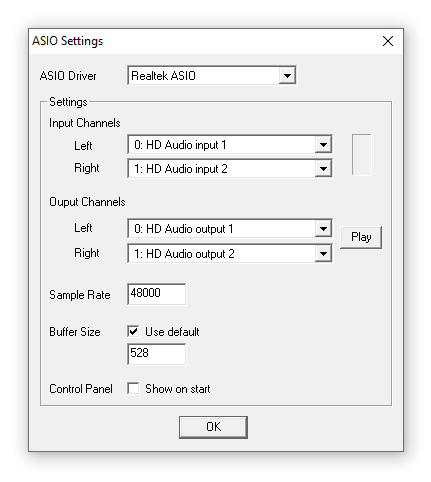
You will need to re-confirm the ASIO driver (play some audio to make sure that it works). Click on OK and your experiment should run fine, with sound.