
How-tos
Recording with a Zoom H2n
If you have suggestions on how to improve this document, or find mistakes, please send them to ilslabs@nulluu.nl
Introduction
For research outside the building, we have some solid state recorders available. You can borrow them from the lab technicians in room 0.09. Be aware that you have to reserve a recorder in the reservation system in advance. We have two Zoom H2n compact portable audio recorders available, which is available in the reservation system Zoom H2n audio recorder(1) and Zoom H2n audio recorder(2). Other options are the Zoom H6 audio recorders, or the Zoom H4 recorders.
To borrow a Zoom H2n recorder, you have to reserve it in the reservation system.
When you borrow a Zoom H2n recorder, you get a soft case containing:
- Zoom H2n portable handheld audio recorder
- SD-card (mounted)
- 2 AA-batteries
- Wind screen (sponge)
- USB cable
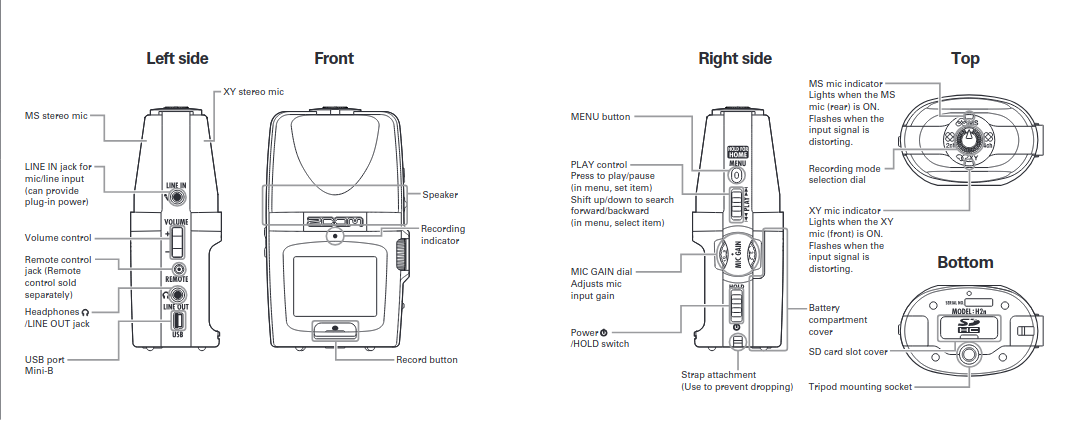
These are the images from the manual describing the parts. Click the image with the center mouse button to view a larger version in a new tab.
The recorder
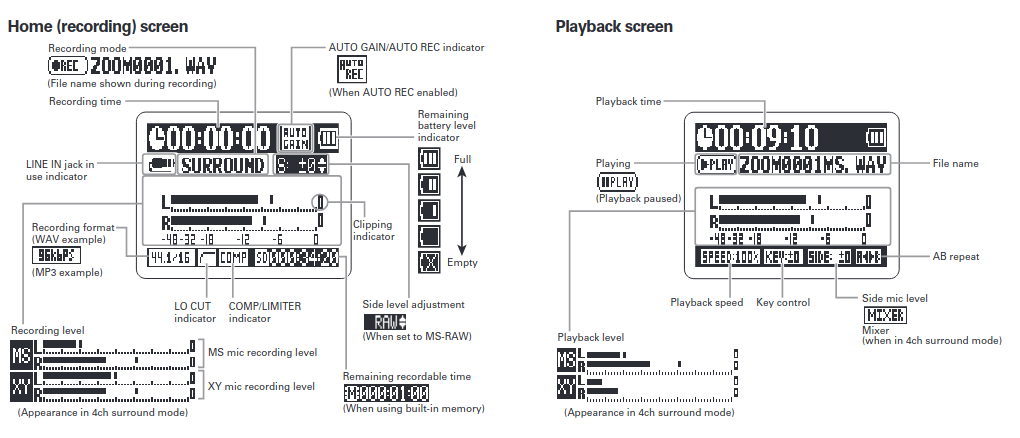
Display
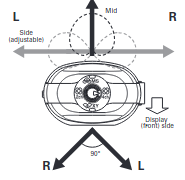
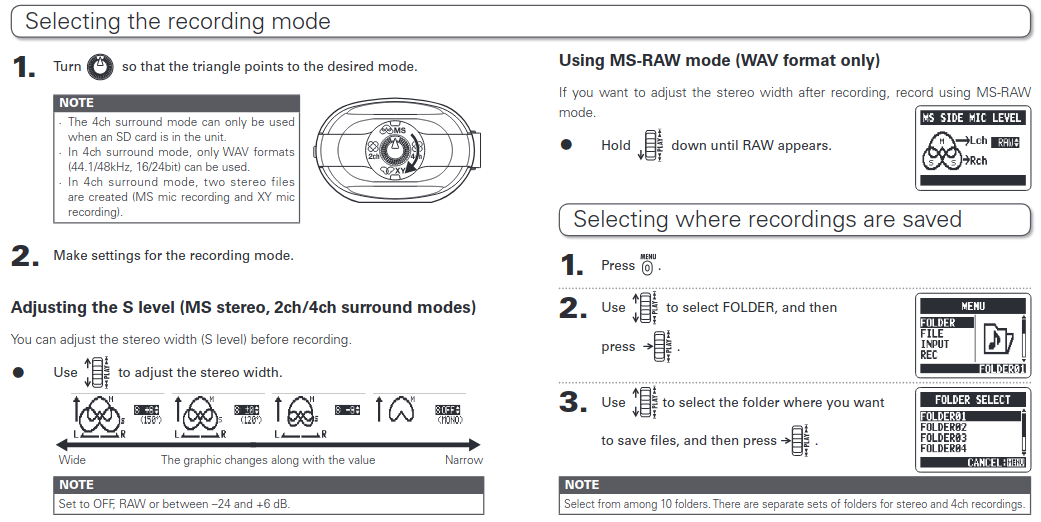
Mid-side (MS) stereo mode
This mode uses a mid mic to capture the sound directly ahead and a bidirectional side mic to capture sound from left and right. The recording level of the side mic (S level) can be adjusted, allowing the stereo width to be changed. If you record with the S level set to MS-RAW, you can also adjust the S level after recording. MS mics can capture a rich stereo image, so it is ideal for recording sounds in wide and open conditions, including orchestras, live concerts and soundscapes

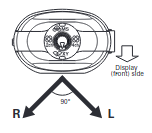
XY stereo mode
This mode records in stereo with mics at 90 degree angles. This allows a natural, deep and accurate sound image to be captured, making it optimal for recording sources nearby, including solo performances, chamber music, interviews, live rehearsals and field recordings
2ch and 4ch surround modes
Sound can be captured in all directions using both MS and XY mics. You can select 2ch, which mixes the signals from MS and XY mics, or 4ch, which records the signals from the MS and XY mics separately. With 4ch surround, you can adjust the balance between the MS and XY signals after recording. The S level can be adjusted for both 2ch and 4ch recordings. These modes are suitable for recording live rehearsals, studio sessions, business meetings and soundscapes, for example.
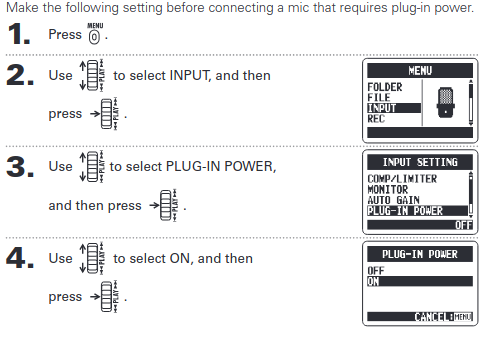
Connecting an external mic
You can connect an external mic to the H2n LINE IN jack
1) Decide what microphones to use
Decide which of the microphone extensions you want to use, or if you would rather use the external microphones (or a combination). Connect those microphones to the recorder. Do this with an XLR or Jack cable for the external microphones or by carefully attaching the extension to the recorder in case of any of the other microphones.
2) Connect headphones
If you have headphones, connect them to the headphones plug.
3) Select power source
If you have a power supply and a power outlet you can use, best plug in the power supply. Otherwise, use the batteries.
4) Switch on the device
Switch on the the device by holding the power switch down for a few seconds (until “Goodbye se you!” appears on the screen).
The screen might look quite complex the first time you look at it. Luckily, everything is explained in the manual. Take a look again at the display image, otherwise look up the full operation manual.
5) Selecting the recording mode
6) Recording automatically
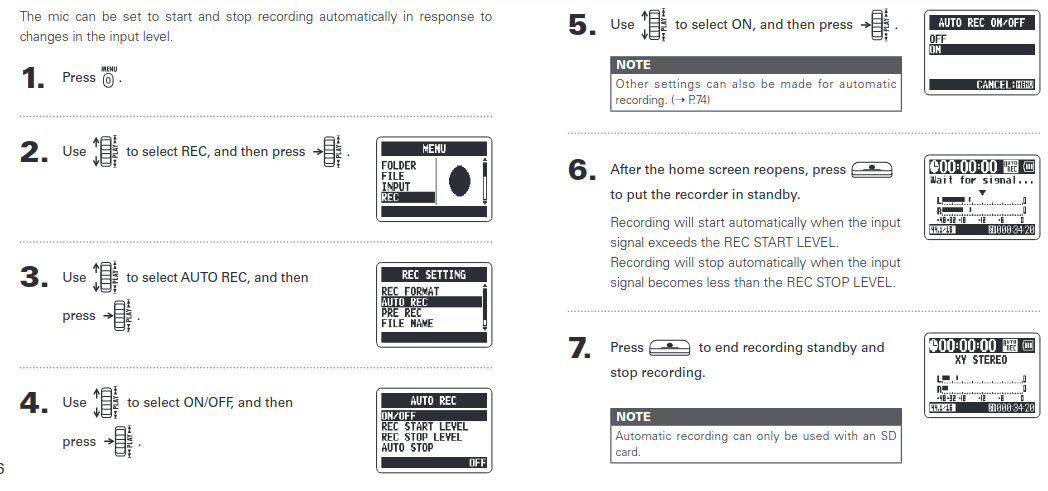
If you haven’t done a lot of audio recording before, it is a good idea to experiment with the device for a time, before asking participants to come in. This will help you in knowing what to do and make the participant less wary of having to wait for you to set up the equipment.
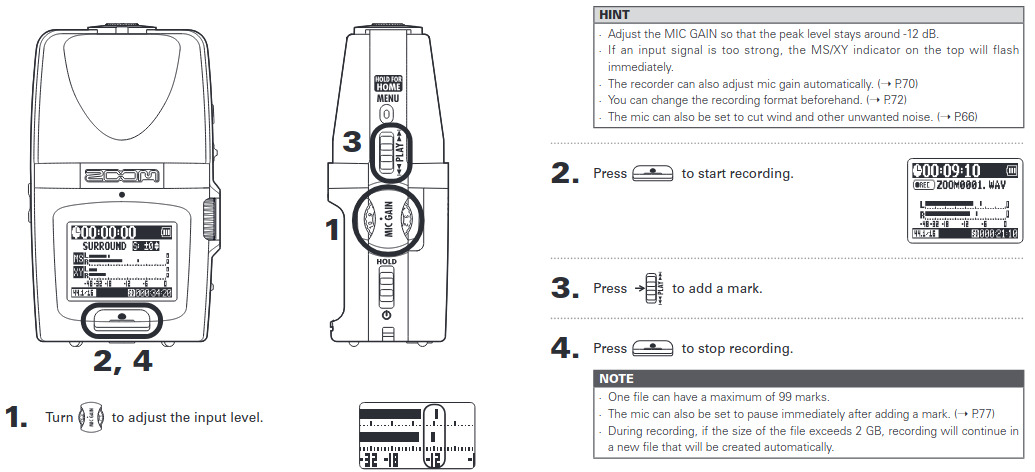
7) Recording manually
One file can have a maximum of 99 marks. The mic can also be set to pause immediately after adding a mark (view operation manual). During recording, if the size of the file exceeds 2 GB, recording will continue in a new file that will be created automatically.
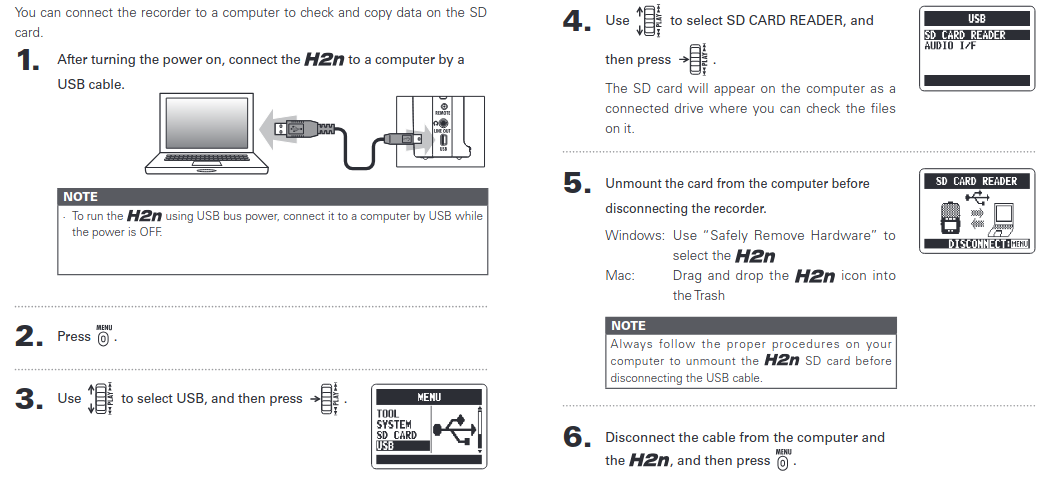
You can connect the recorder to every computer that has a USB interface. The recorder will behave as a kind of memory stick. You can copy the .wav and .mp3 files to your computer. (Don’t forget to make a backup copy, for example on a dvd or cd-rom!)
To connect the computer to the recorder, follow these steps:
- Take the USB cable and connect it to the recorder and the computer.
- Open te menu, go to the USB symbol and select “SD card reader”.
- Within a few seconds, the recorder should be visible in your file explorer.
Please remove your audio files after you copied them and before you return the recorder to room 0.09.
You can either delete the files manually from the computer or from the recorder, or format the card entirely. Check the manual for instructions on how to format the SD card.